Ceiling speakers are the hidden gems of audio systems, creating a unique Dolby Atmos atmosphere. They do not take up much space, but it is important to know how to connect ceiling speakers to receivers correctly. The process is not too complicated, but it requires understanding some nuances. Therefore, before you start the installation, you must develop a strategic approach because a small deviation can lead to an incomplete effect. That will be a pity because you already had time to drill holes in your ceiling! Please don’t panic, friends; I’m here and will walk you through the process step by step. Me and the user manual for your system components. Let’s go.
Before installation

In this case, preparation is more important than the installation itself. Before connecting ceiling speakers to the receiver, do the following:
Determining the location of the loudspeaker system
First, decide exactly where your home theater will be located. Think about where you want to sit on a comfortable couch when watching movies, assess the obstacles” for the acoustic signal (cross or vertical beams, for example), and get an old wiring plan of the house because you will have to drill and pull wires.
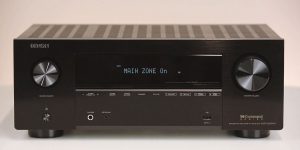
Next, get your hands on the owner’s manual for your receiver and speakers. Those who never take such things in their hands – take it anyway. After all, you will find detailed recommendations on location and installation, considering the configuration for Dolby Atmos technology: ceiling speakers can be 2, 4, or more.
If your possibilities and recommendations of the manual do not coincide (interfere with the beam, for example), or you are planning ceiling speakers for listening to background music and do not find recommendations, that’s okay. In confidence, placing them closer to the audience/listener will be a viable option.
Check compatibility
I think you’ve taken care of this, but still, make sure the speakers and receiver’s power and impedance settings are compatible. This will keep you from replacing speakers in the future, which can get damaged over time if they are not compatible.
Tools and materials needed
Gather your tools – spike finder, power drill, fishing tape for wiring, gloves, bolts and screws, knife or scissors for stripping wires. I know from experience how unpleasant it is to run back and forth while standing on a chair under the ceiling. Turning off the power (or at least the power supplies) would also be very smart of you.
Installation Guide

The time has come. You’ve thought of everything, prepared, and are ready to learn how to wire ceiling speakers. I hope your knees aren’t shaking; we don’t need that.
Scene check
I highly recommend first ” setting up” the speakers by taping or attaching them and plugging in the system. Just listen to see if everything is to your satisfaction. Nothing is more frustrating than tearing up half the ceiling and discovering that “that 10 cm” was extra. Wouldn’t you agree? Walk around and listen to see if you can hear the sound from wherever the listeners will be seated.
Then, make markings with a pencil according to the size of the speakers.
Dirty work
Goggles on, work suit on your body, drill (or drywall saw) in hand, and you can safely hole your ceiling. Do it with confidence. After all, it’s your home, ceiling, and theater.
Next, it’s easier. Please clean up the debris and install the brackets (almost every kit has them).
Laying the wires
I must disappoint you if you thought this was the end of your time on a chair or stepladder. You still need to lay the wires.
Basically, the wires look like red and white, so just split them into a “Y” shape, strip the ends, and connect them to the appropriate terminals, observing polarity. Don’t forget the insulation, as we don’t want short circuits.
If the connection is a socket connection, it’s even easier.
Installing the speakers
There’s not much left to do. Now, you should install the speakers into the holes. Once again, take the manual into your hands and carefully study the information. There, you can often find details, including pictures.
If suddenly the manufacturer did not take care of your nerves, arm yourself with a screwdriver and bolts, and gradually screw in the speaker, not too overtightening, but firmly (or install on brackets). After all, the speakers will move in line with the soundtrack, so they must sit tight.
Finishing touches
If there are any gaps left between the installed speakers and the ceiling, cover them with putty or special tape. Well, it can happen because we’re not professionals.
And I would hide the wires under the conduit or neatly pull them through and mount them on the wall for aesthetics.
Enjoy
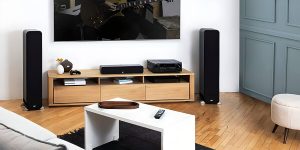
Turn the system on and give it a sound test drive. Immerse yourself in the soundscape you’ve carefully created. Adjust the balance, volume, and equalization settings to customize the sound.
Conclusion
Every step, from choosing the perfect venue to setting up the sound, has contributed to creating a harmonious sonic journey that will henceforth accompany your evenings. And it’s all down to you! Now, sit back and let the sound take over. Let the show begin!